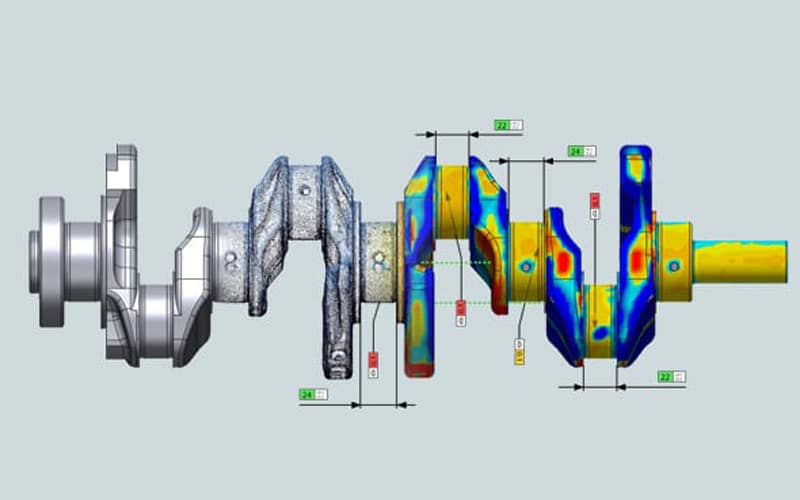
In this article we will learn:
- What is inspection? Metrology?
- Traditional Inspection and metrology Methods, how they are used?
- Limitations of Tactile probing and CMM inspection methods.
- Introduction to 3D scanning
- Case Study example of Inspection and metrology using 3D scanning
- Further Advantages of 3D Scanning for Inspection and Metrology Operations.
What Is Inspection? Metrology?
“Inspection is an organized examination or formal evaluation exercise. In engineering, inspection involves the measurements, tests, and gages applied to certain characteristics in regard to an object or activity. The results are usually compared to specified requirements and standards for determining whether the item or activity is in line with these targets.”
— F.C. Campbell, Inspection of Metals – Book
“Metrology is the science of measurement, embracing both experimental and theoretical determinations at any level of uncertainty in any field of science and technology.”
—The International Bureau of Weights and Measures (BIPM 2004)
Traditional Inspection and Metrology methods, how they were used?
Historically, traditional measuring devices and CMMs have been largely used to collect inspection and metrology data on which to make the decision to accept or reject parts. Traditional measuring devices involve rulers, gauges, callipers etc., which are contact-based or tactile inspection techniques. Though co-ordinate measuring machine (CMM) is also a contact-based inspection technique, it is a widely in industries for its high accuracy and precision probing.
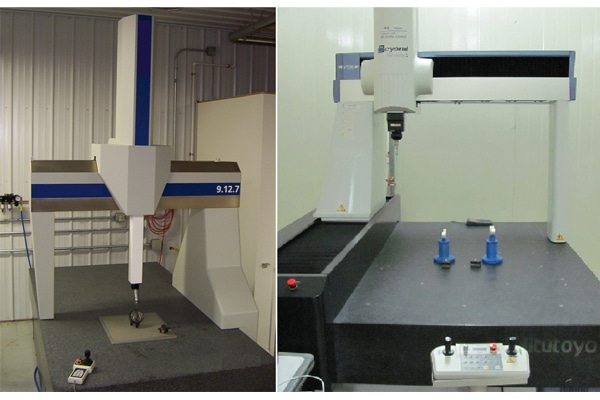
Example of a co-ordinate measuring machine (CMM) with a probe
CMM are primarily characterized by their flexibility, being able to make many measurements without adding or changing tools. But CMM are also quite expensive, time taking and sometimes unreliable for manufacturers and innovators because of its limitations.
Limitations of Tactile probing and CMM based inspection
- Soft and flexible components or extrusions cannot be reliably measured and delicate or fragile parts may get damaged or become contaminated.
- The accuracy of tactile probing technology relies heavily on the assumption of perfect geometry for good feature fitting.
- Due to the low sampling rate, tactile data is very sensitive to imperfections of the geometrical feature.
- Parts that have flatness and roundness errors, edge rollover or burrs are particularly problematic.
- Radius compensation error is a further difficulty with tactile probing When a stylus makes contact with the edges of a hole, for example, radius compensation may result in unexpected measurement points if a neighbouring surface is touched first.
Introduction to 3D Scanning
“3D Scanning is a process of collection of three-dimensional data of the surface of a body/object with geometrical, shape, form and colour information embedded in it, using a 3D Scanning device.”
The advent of machine vision in the early 1980s had paved the path for 3D scanning into industrial inspection and quality control. Now, 3D scanning is on par or in some ways a much better solution for inspection and metrology than CMM because of its accuracy, reliability, speed, and ease of use. Its noncontact nature and exceptional flexibility make it ideal for measuring a wide range of parts in a wide range of places.
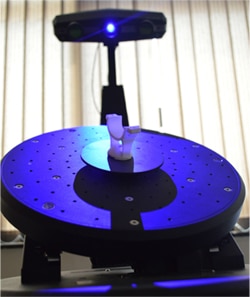
Case study example of Inspection and Metrology using 3D Scanning
Let us learn how a 3D Printed prototype of a component is 3D scanned and carried out inspection and metrology process on it. The original broken component is part of a mobile holder equipment. A Prototype of the component is 3D printed in MJF 3D Printing technology. Then the prototype is used for inspection and metrology after 3D scanning with Solutionix C500, Medit Desktop 3D scanner.
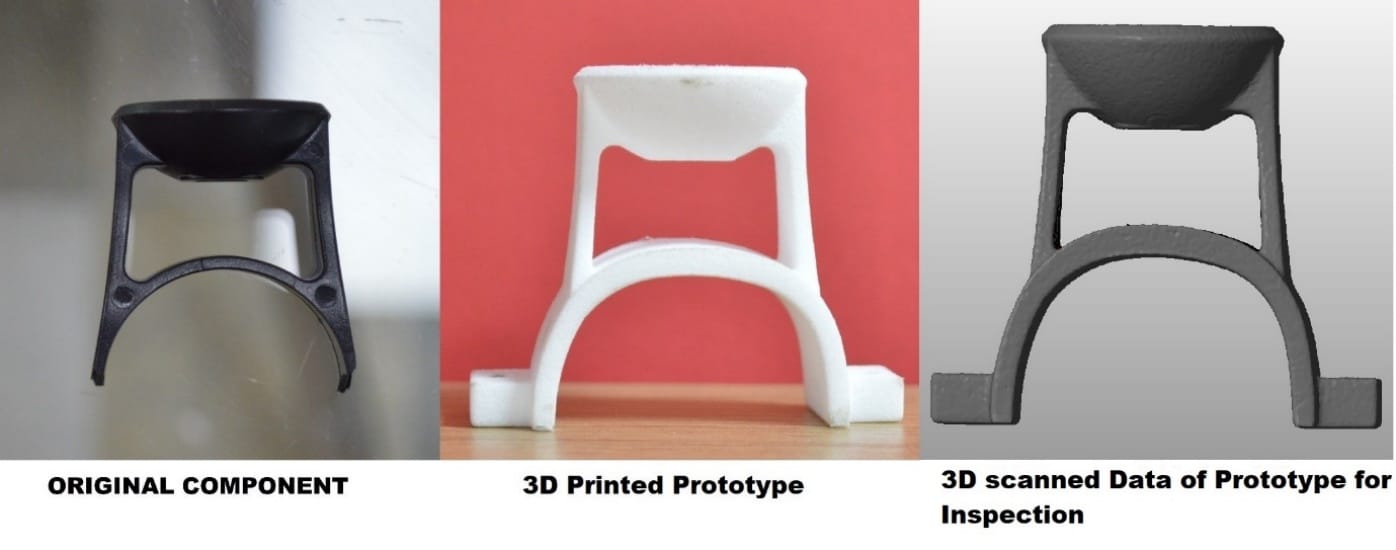
The following are the methods in which we utilize 3D Scanned data of the prototype for inspection and metrology operations,
- Part to CAD Analysis:
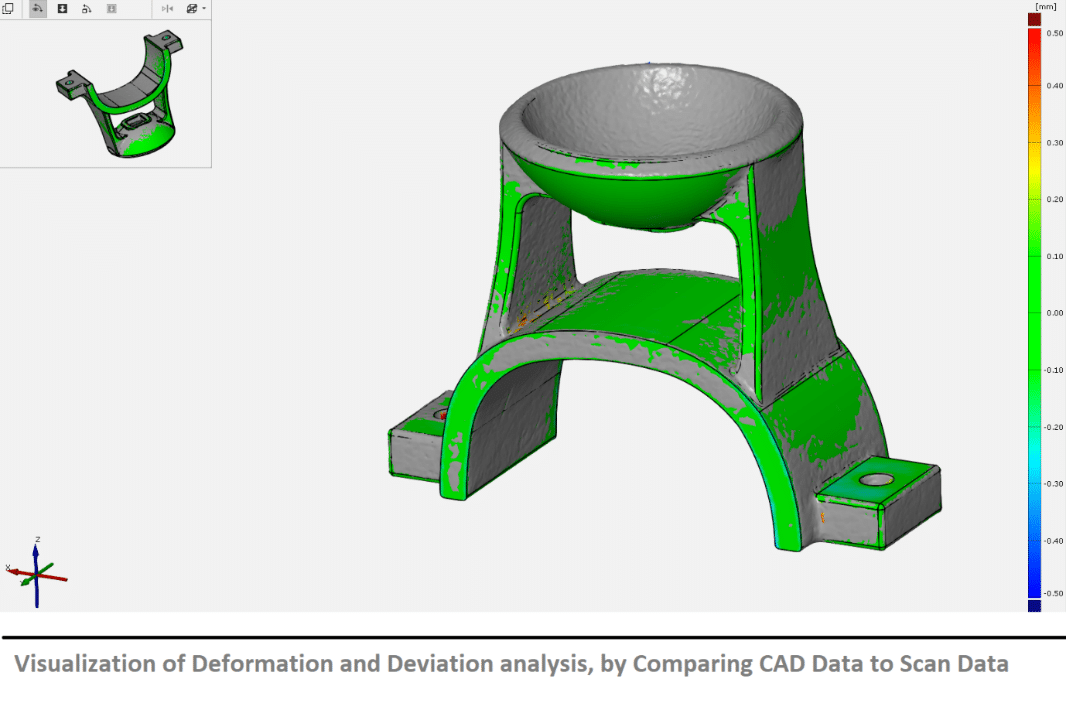
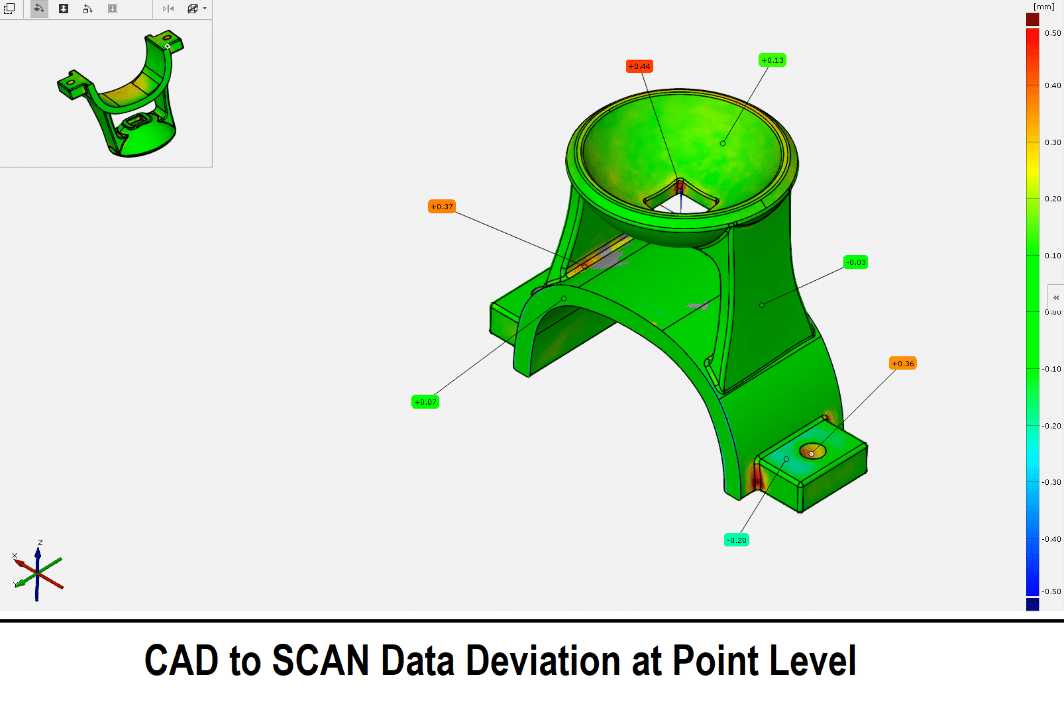
The computed triangular mesh data describes freeform surfaces and standard geometries. First article inspection of 3D scanned data against CAD data using best-fit, feature-align or other techniques in a Scanning software interface gives a highly defined visualization of the deformation and deviation analysis.
- Dimensional Inspection:
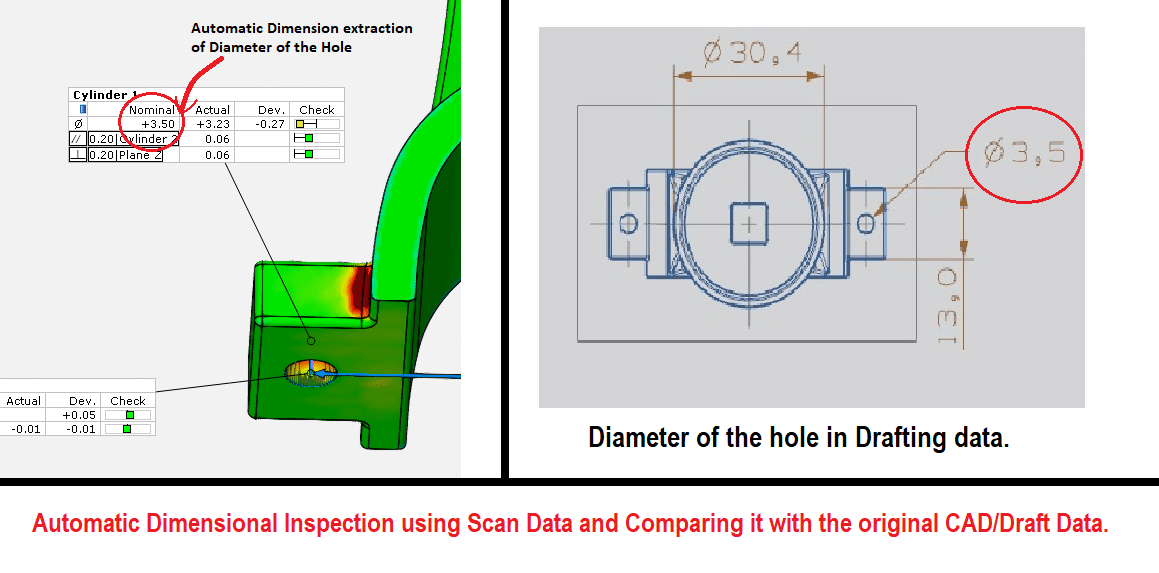
Unlike Conventional metrology where we measure each and every dimension like diameter, length, width, depth, thickness, ovality etc. 3D scanning captures the component in its true form and accurate dimension. Also, 3D scanning software’s enable us to measure those dimensions directly from the scanned data and compare its original dimensions from CAD or a drafting data.
- GD&T Analysis:
With the intervention of 3D scanning Inspection software’s like Geomagic Control X, GOM Inspect, VX Inspect etc., a full GD&T analysis, Intelligent feature extraction and inspection of location, cylindricity, parallelism and much more is possible with the Scanned data.
- Automated Inspection:
Modern 3D scanning Software’s capable of automating inspection of similar parts, where any completed evaluation can be easily applied to two or more parts. The software automatically stores each individual inspection step of one product, then adapts and applies it to the other products. All evaluation steps can be operated without scripting, previous planning or user intervention, Providing operator-independent, reliable data, in a timely fashion.
- Digital Inspection:
3D Scanning enables on demand inspection of parts anywhere in the manufacturing process chain. Digitising parts beforehand and inspecting the virtual digital copies when needed provides a high level of detailed knowledge by streamlining metrology operations and embedding them into an integrated digital manufacturing processes like 3D Printing and digital twins. 3D scanning also reduces product development time, since once the digital model of a prototype is available, product verification, engineering analyses and other functions can take place concurrently.
Further Advantages of 3D Scanning for Inspection and Metrology Operations:
- Laser 3D scanners, by measuring from a stand-off cause no deformation of soft materials or inadvertent damage to expensive, fragile components which is not possible with a tactile probing and CMM.
- In Automobile Manufacturing a vehicle’s entire sheet metal structure can be inspected to very close tolerances and virtually assembled, showing the interaction between the panels and allowing parts issues to be separated from process issues.
- With Industry 4.0 practices integrating all areas of manufacturing industry to improve the end-to-end efficiency of production processes, 3D laser scanning is set to become a key component in its implementation. Real-time feedback of inspection results to machine tools allows product quality to be maintained, downtime to be minimised, and rework and scrap to be avoided.
I hope this information will empower you in understanding the significance of 3D scanning as an effective technique for inspection and metrology. If you are new to 3D scanning Technology and want to utilise 3D scanning capabilities, I would recommend that an expert 3D scanning technology partner like Think3D p.v.t ltd will help you reach your inspection goals easily.
–J.G.S Prasanth (B.Tech, Mechanical Engineering)
